Barq
☰
Working stepsStatus meaningsGet helpالعربيةHomeLog in
Customer manual

From an idea to a published application — step by step

This guide explains the complete Barq journey in simple language. Follow the steps in order so you always know what is happening and what you need to do.

The journey in six steps

  1. 1Create your account
  2. 2Describe your project
  3. 3Connect Telegram
  4. 4Send requests
  5. 5Review Development
  6. 6Publish when ready
Barq

Before you begin

Prepare a short description of your idea, a project name, and any logo or images you want to use. You do not need to be a developer.

  • ✓Use an email account you can open for confirmation and notifications.
  • ✓Install Telegram on your phone because it is the main way to work with Barq.
  • ✓Start with one clear request, then improve the application step by step.
01 — 16

Complete working guide

1

Choose a plan

Start on Free to evaluate your idea. Solo adds staging, production, and domain management for one project. Builder supports up to three projects and more Barq minutes.

Follow these actions

  1. Compare the project, minute, and environment limits shown for each plan.
  2. Choose Free for evaluation, Solo for one production project, or Builder for multiple projects.
  3. Select the plan and create your account; Free does not charge a card.
How do you know it worked?The selected plan is clear and you can continue without an unexpected capacity warning.

Illustration of this step in the Barq workflow: Choose a plan
Choose a plan
2

Create your account

Select Start free, then register with email, Google, GitHub, or LinkedIn. Confirm your email and set a strong password when asked.

Follow these actions

  1. Select Start free on the homepage.
  2. Choose email, Google, GitHub, or LinkedIn.
  3. Open the confirmation email when requested, then sign in to your Barq dashboard.
How do you know it worked?Your named subscriber dashboard opens and shows the current plan.
Illustration of this step in the Barq workflow: Create your account
Create your account
3

Enter project details

Give the project a clear name and a short description of what you want to build. You may add a logo and images now or later in the media library.

Follow these actions

  1. Enter a project name in Arabic or English.
  2. Edit the suggested English URL prefix if needed.
  3. Describe users, pages, and features; add optional media; then select Create.
How do you know it worked?The setup page shows the project, a reserved Development URL, and progress.
Illustration of this step in the Barq workflow: Enter project details
Enter project details
4

Connect Telegram

Open the Barq bot link shown to you and press Start. The secure link belongs to your account and project and can be used only once.

Follow these actions

  1. Open the secure invitation shown in the Telegram step.
  2. Tap the link on mobile or scan the QR code from desktop.
  3. Press Start in the Barq conversation and wait for connection confirmation.
How do you know it worked?You see Telegram connected successfully and the flow advances to the first task.
Illustration of this step in the Barq workflow: Connect Telegram
Connect Telegram
5

Start the first task

When you press Start, Barq begins with the project brief you entered. The bot confirms that work started, then sends the result after testing and deployment.

Follow these actions

  1. Read the bot message confirming that the build started.
  2. Let Barq finish source editing, testing, and managed deployment.
  3. Watch the project page or chat until the result and application URL arrive.
How do you know it worked?You receive a task result followed by a deployment message with a working application URL.
Illustration of this step in the Barq workflow: Start the first task
Start the first task
6

Request changes in plain language

Say what you need and the expected result, for example: “Add a product page with search, pictures, and prices.” Include the required facts and media.

Follow these actions

  1. Ask for one clear outcome and identify the affected page.
  2. Include copy, numbers, colours, media, and anything that must not change.
  3. Wait for the result and deployment before submitting the next change.
How do you know it worked?The task appears in Activity and produces a relevant result with a clear deployment state.
Illustration of this step in the Barq workflow: Request changes in plain language
Request changes in plain language
7

Add images and files

Use the media-library link sent by the bot or open Media on the project page. Upload and select files, return to chat, and explain how Barq should use them.

Follow these actions

  1. Open Media on the project or the secure library link in Telegram.
  2. Upload logos, banners, or product pictures with meaningful file names.
  3. Select the required pictures, return to chat, and explain where each should appear.
How do you know it worked?The files appear in the private project library and Barq can reference them in the next task.
Illustration of this step in the Barq workflow: Add images and files
Add images and files
8

Review Development

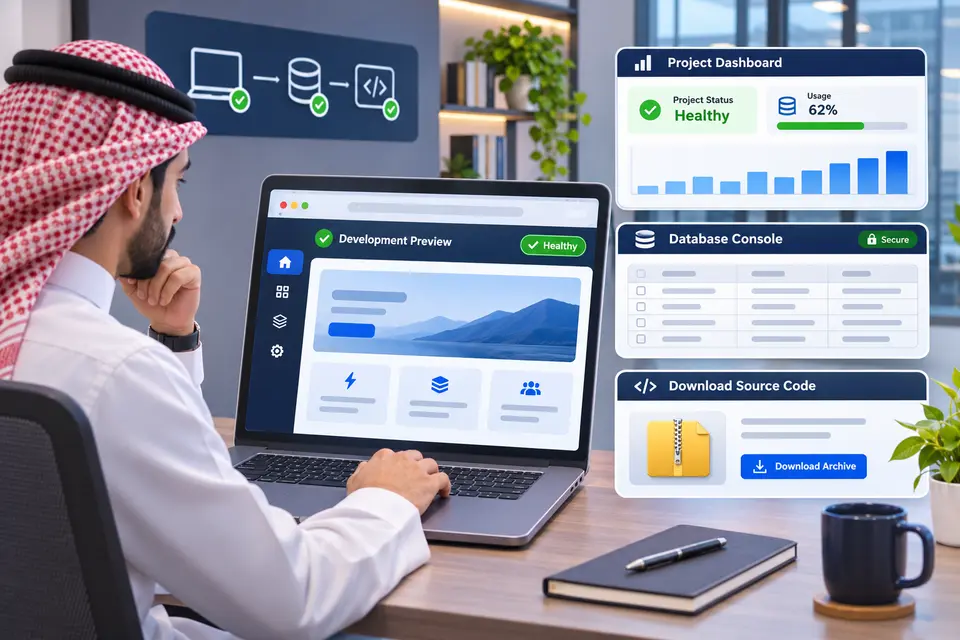
Every project has a secure Development URL for review. Open it after the deployment success message, test it on phone and desktop, and request changes in Telegram.

Follow these actions

  1. Open the project and select its Development URL.
  2. Test important pages, buttons, and forms on phone and desktop.
  3. Report feedback with the page name and a screenshot when useful.
How do you know it worked?The HTTPS URL opens and serves the latest healthy application release.
Illustration of this step in the Barq workflow: Review Development
Review Development
9

Understand task statuses

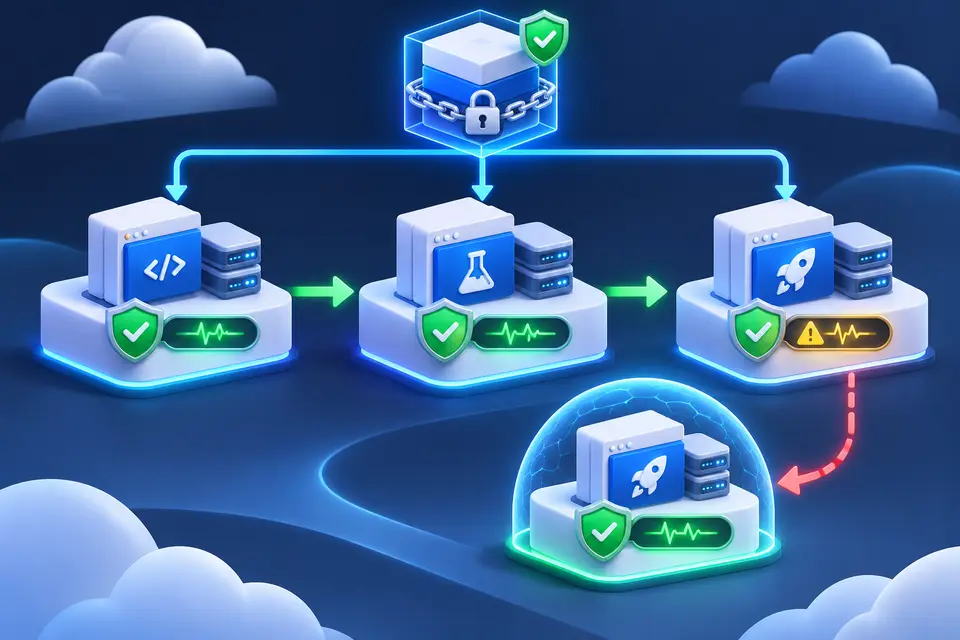
Queued means waiting, Running means work is in progress, Build means the release is being tested and packaged, and Deployed means it is published. Failed means the new release was rejected and the last healthy release stayed online.

Follow these actions

  1. Open Activity or Latest deployment on the project.
  2. Match the state to waiting, running, building, deployed, or failed.
  3. Open details or contact support if a state makes no progress for an unusual period.
How do you know it worked?The state includes an update time and a useful inspection link or next action.
Illustration of this step in the Barq workflow: Understand task statuses
Understand task statuses
10

Access your database

Open Data or Database in the project. Barq opens CloudBeaver with automatic sign-in, where you can view and export your project's managed MySQL data.

Follow these actions

  1. Open the project and choose Data or Database.
  2. Allow CloudBeaver to open in a new tab; Barq signs you in automatically.
  3. Select your project database, inspect tables, and export data when you need a copy.
How do you know it worked?Your database opens without a second login and displays only the permitted project data.
Illustration of this step in the Barq workflow: Access your database
Access your database
11

Download your source

Choose Download source from the project menu. You receive a clean ZIP with the source and installation guide, excluding temporary files, secrets, and reinstallable packages.

Follow these actions

  1. Open the project tools menu and choose Download source.
  2. Save the ZIP and read the included README or installation guide.
  3. Keep it safely and download a fresh copy after important changes.
How do you know it worked?A clean ZIP downloads with guidance and without secrets or node_modules.
Illustration of this step in the Barq workflow: Download your source
Download your source
12

Track minutes and billing

Usage & billing shows used and remaining minutes, plan limits, renewal, and invoices. Stripe securely handles payment, upgrades, and subscription management.

Follow these actions

  1. Open Usage & billing to review consumed and remaining minutes and renewal.
  2. Choose Change plan or Manage billing when needed.
  3. Complete Stripe checkout, return, and wait for the trusted subscription state.
How do you know it worked?The plan changes only after Stripe confirmation, then allowances and limits update.
Illustration of this step in the Barq workflow: Track minutes and billing
Track minutes and billing
13

Move to Staging

On a paid plan, use Staging to test a production-like release. Review changes and the database migration plan before approval.

Follow these actions

  1. Open Hosting or Environments and choose Staging.
  2. Select a size allowed by your plan and deploy the latest healthy Development release.
  3. Test the Staging URL and review the database migration plan before approval.
How do you know it worked?Staging becomes healthy with a URL and the exact release you reviewed.
Illustration of this step in the Barq workflow: Move to Staging
Move to Staging
14

Publish to Production

After Staging succeeds, select Deploy to production and review the release summary. Barq publishes a tested immutable image and checks health before sending visitors to it.

Follow these actions

  1. Confirm that the same release is healthy in Staging.
  2. Select Deploy to production and review the displayed release and risks.
  3. Wait for health checks, then open and test Production without interrupting visitors.
How do you know it worked?Production reports Healthy and the public URL works while the previous release remains rollback-ready.
Illustration of this step in the Barq workflow: Publish to Production
Publish to Production
15

Connect a domain

Buy a domain through Barq or add one you already own. For an external domain, copy the displayed DNS records exactly, verify ownership, and connect it to Production.

Follow these actions

  1. Open Domains and choose to buy a domain or connect an external one.
  2. Complete ownership verification and enter Barq's DNS record name and value exactly.
  3. Select the Production project, request HTTPS activation, and wait for Verified and Active.
How do you know it worked?Ownership shows Verified, certificate shows Ready, routing shows Active, and HTTPS opens.
Illustration of this step in the Barq workflow: Connect a domain
Connect a domain
16

Get support

Open Support, choose a category, and enter a clear title and description. Barq sends an email confirmation and keeps the team's response on the request.

Follow these actions

  1. Open Support and select the correct category.
  2. Write a clear title and include the project, failed step, and approximate time.
  3. Submit and follow the confirmation and response in Support or your email.
How do you know it worked?A request number and state appear and a confirmation email is delivered.
Illustration of this step in the Barq workflow: Get support
Get support
Status

Status meanings

InformationQueued / Preparing

The request is recorded or resources are being prepared. Wait and keep watching the page.

In progressRunning / Building

Barq is doing the work or building the release. Do not duplicate the request.

SuccessHealthy / Deployed / Verified

The step is complete. Open the URL or continue to the next stage.

Action neededPending / Warning

Read the instruction; email, DNS, or payment confirmation may be required.

Safe failureFailed

The new release was not published. The last healthy version remains online; inspect the reason or contact support.

Simple rules for better results

  • ✓Ask for one clear outcome in each message.
  • ✓Attach the required content and images; do not only say “improve the site.”
  • ✓Review Development before moving to Staging or Production.
  • ✓Keep periodic copies of your data and source.
  • ✓Do not place secrets or sensitive personal data in chat.
  • ✓Treat preview applications as development systems until proper production hosting is enabled.
Support

Are you stuck?

Start with the dashboard to review the current status, or send a support request and we will help you complete the step safely.